Busy Dinners

Cooking, Recipes

A new #askmim request appeared in my inbox the other day, this one is from Veena. Ahoy there Veena!

Veena said:

“I’m a fish eating veggie and am going back to a really full on job after having a baby. I want to be able to cook something delicious and healthy when I get home, that isn’t pasta, and doesn’t mean that I spend ages in the kitchen away from my daughter when I should be spending time with her. Any ideas?”

Good challenge. Righteo, I’ve spent some time cooking up a few  ideas this week and come up with 3 tasty new mid-week suggestions for you.

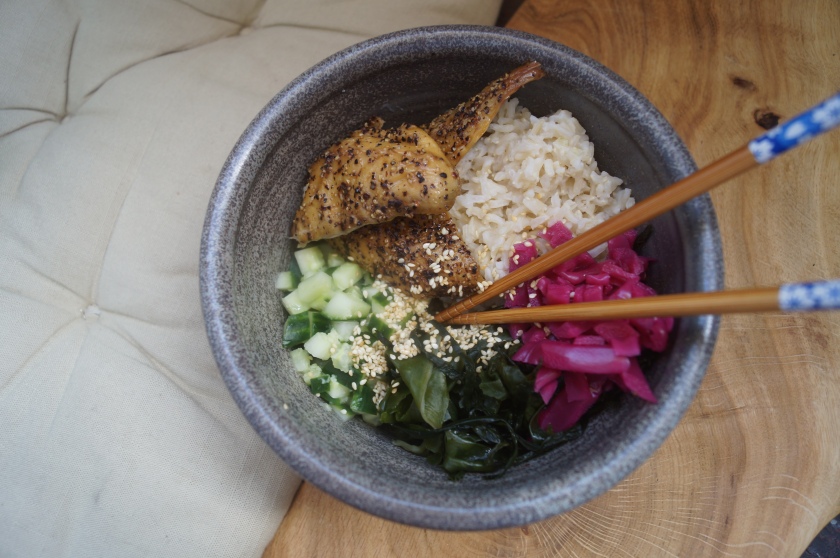
Mackerel Rice Bowl

Easy Mezze

The first was inspired by some of my favourite sushi ingredients. You can vary it too though, tofu would be ace instead of mackerel and any green veg like spinach or green beans could take the place of the seaweed as it can be a bit tricky to get hold of.

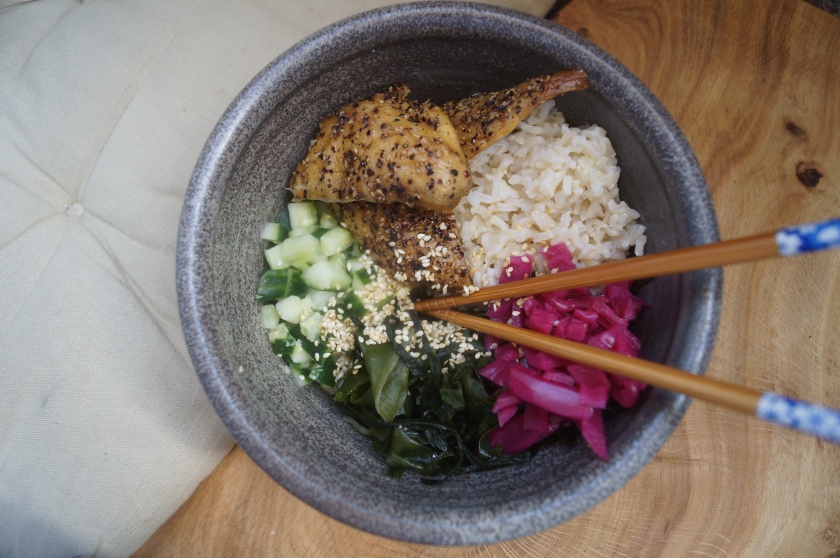
Smoked Mackerel Sushi Bowl

Serves 1

Ingredients

75g brown rice (dried or a sachet of microwave brown rice)

chunk of cucumber (I used about 50g)

1/2 teaspoon of finely grated fresh root ginger

2 teaspoons of rice vinegar

1 tablespoon of toasted sesame seeds

1 or 2 smoked mackerel fillets

To serve

1 tablespoon of pickled red cabbage

a handful of dried seaweed (which has been rehydrated in some boiling water – check pack for guidance) or some wilted spinach

Method

1. If you’re using uncooked rice pop that on to boil for 20-25 mins (check the pack for proper timings). If you’re using the microwave kind (nowt wrong with that – check the pack but all they usually add is a dash of veg oil to stop it sticking together) heat that up at the last minute.

2. Next mix the cucumber, grated ginger and rice vinegar together in a nice bowl or soup dish then nudge it to one side to make space for everything else. Pile the cooked rice in down one side, tuck in the mackerel fillets, add the seaweed or spinach then the pickled cabbage and finally sprinkle the toasted sesame seeds over the rice. Add a spritz of soy sauce if you like but I’m not sure it’s necessary. Dig in!

Mackerel sushi bowl

Sometimes all I want for dinner is a big sandwich and this one is great as it’s so quick, filling and probably jolly healthy too as the fish is poached gently in water.

Poached Salmon Pittas 

Serves 2

Ingredients
2 salmon fillets
5 black peppercorns

1 tablespoon of Greek yogurt or sour cream

handful of soft fresh herbs (I used a mix of dill and basil but parsley, chives or tarragon would also be fine)

2 wholemeal pitta bread

handful of salad leaves

1/2 punnet of salad cress

Method

1. Half fill a deep sided sauté pan or medium sized saucepan with water and add the peppercorns. Bring to the boil then add the salmon fillets. Turn the heat right down and simmer gently for about 10 minutes or until the salmon is just cooked through and when you break a piece off the flesh is opaque pink.

2. Take the salmon out of the water with a slotted spoon, discard the peppercorns and leave the fish to rest just while you pop the pitta bread in the toaster.

3. Chop the herbs with scissors and stir into the sour cream or yoghurt. When the pitta is ready, cut a slit in each one along one of the long sides and divide the herby mixture between them.

4. Peel the skin away from the salmon (if it had it on) then gently break the fish into pieces and put them inside the pittas. Stuff with salad leaves, sprinkle in the cress and serve.

Poached Salmon Pitta

And finally a bit of a treat, even midweek…perhaps especially midweek! Pretty much everything on this platter keeps really well in the fridge, so can be hurled together whenever you need a little lift, like your own mini party!

Storecupboard Mezze

Ingredients

1 espresso cupful of couscous

1 tablespoon of light tahini

pinch of smoked paprika

3 mini crisp breads or 1 flatbread of your choice

few olives

few sundried tomatoes

1-2 tablespoons of feta cheese

1 teaspoon of pomegranate molasses

1/2 an avocado

Method

1. Pour the couscous into a heatproof bowl then add 1 1/2 espresso cupfuls of boiling water. Leave to stand whilst you prepare the rest.

2. In a small bowl mix the tahini with enough cold water to make a houmous-like consistency. Keep mixing until it’s nice and smooth then sprinkle the smoked paprika on the top and if you like a little drizzle of the oil from the sundried tomatoes.

3. Once the couscous has absorbed the water, fluff it up a bit using a fork to break up the grains then add the feta and the pomegranate molasses.

4. Pop everything else on a platter and dig in, cold glass of something lovely (alcoholic or otherwise) is a jolly nice addition.

Storecupboard Mezze

Hope you like the recipes, do let me know what you think x

If you would like me to write a recipe for you too or answer a burning kitchen conundrum please get in touch via facebook, instagram or twitter using the hashtag #askmim.

Homemade Pasta

Cooking, Recipes

The latest #AskMim request comes from Elaine, hello Elaine! She wanted to know how to make fresh pasta and a good recipe for goat’s cheese & watercress tortellini…no problemo!

fresh pasta

Some of my favourite recipes are so neat, and once they’re in your head they stick there forever, always ready when you need them.

tagliatelle

Fresh pasta is just such a recipe, once you know the formula – it’s with you forever and you can play around with it all you like.

1 large egg + 100g pasta flour = 1 portion of fresh pasta.

(Use grade ‘00’ / pasta flour if you can get it, if you can’t try strong white bread flour or ordinary plain flour.)

Method

1. Tip the flour into a large mixing bowl, make a well in the centre and add the egg. Using fork beat the egg into the flour then pop the fork down and get stuck in with your hands. Knead it really well for about 5 minutes until it’s smooth and elastic.

2. Wrap the ball of dough up in cling film and leave it in the fridge. It will keep happily in there for about half a day, any more than that and the dough tends to oxidise and you get a grey tinge to the outside which looks a bit dodge.

3. If you want to serve the pasta with something slow cooked like a rich tomato sauce or a ragu, now is the time to get cracking on that.

4. To shape the pasta, press it gently with your hands so it’s like a pitta bread and rub it with a dusting of flour. Set your pasta rollers to the thickest setting on the machine. Run the pasta through twice, rub again with a little flour then switch it to the next setting down. Again run the dough through twice. Keep going, rolling and dusting with flour until you’ve been through all the settings, or until it’s the thickness you want. If you have one, add the cutting attachment for spaghetti or tagliatelle and run it through to cut it up. Alternatively, fold it into a concertina and slice it to get long ribbons of pappardelle or cut into squares with a knife, or circles with a cookie cutter, for tortellini and ravioli. If you don’t have a pasta machine, don’t fret. You can roll it out with a rolling pin (I usually do, I borrowed the pasta machine especially). Rolling it out by hand works fine, but it can be a bit heavy going, especially when you want to get it really thin. 

Homemade pasta

5. Pop some flour (or fine semolina) onto a work surface and toss the pasta ribbons in the flour so that they don’t clump together.

fresh tagliatelle

6. Bop it into a large pan of boiling water, (salted or fling in a glug of olive oil in there if you like) and cook for 4-5 mins or to your liking. Scoop the pasta out of the boiling water with a slotted spoon/pasta spoon, straight into a serving dish or into the pan with the sauce in. A splash of pasta water is good for thinning down a thick sauce that needs a little more movement. Serve straight away.

tortellini making

For the goat’s cheese tortellini

Ingredients

2 portions worth of fresh pasta, as above (rolled out into sheets and cut into squares approx. 7 – 8cm square)
100g soft goat’s cheese
1 clove of garlic, crushed
50g watercress, finely chopped
1 egg
1 tablespoon of pine nuts, crushed
3 tablespoons of finely grated parmesan
pinch ground nutmeg
salt & black pepper

Method

1. In a small saucepan mix all the ingredients together, then cook gently over a medium heat for about 5 minutes or until thickened, stirring all the time as if you were making scrambled eggs. Remove from the heat and allow to cool, then it’s ready to pop into the pasta.

cheese and watercress filling

2. Place 1/2 teaspoonfuls of the mixture into one corner of each pasta square. Fold the oposite corner over it to seal it in. You might want to use a little water or egg wash to seal it. Push the air out carefully then roll the triangle up twice (like when you roll a neckerchief in the scouts/guides). Turn the parcel over and fold the ends to the middle then to the back, pressing gently but firmly to make sure it’s sealed well.

Folding tortellini

3. When you’ve repeated the process with all of the pasta and the filling, drop them carefully into boiling water for 3-4 minutes or until they’re starting to bob merrily on the surface. Scoop out with a slotted spoon. I like to serve mine very simply with a little more finely grated parmesan and some salt and pepper.

Buon appetito!

x

Goat's cheese and watercress tortellini

If you would like me to write a recipe for you too or answer a burning kitchen conundrum please get in touch via facebook, instagram or twitter using the hashtag #askmim.

Happy Cooking and thanks Elaine for getting in touch. Hope you have fun making pasta. xx

Pineapple & Coconut Trifle

Cooking, Recipes

Vegan Christmas Dessert

/home/wpcom/public_html/wp-content/blogs.dir/697/34179854/files/2014/12/img_3330.jpg
The next #askmim request out of the hat was via instagram and from @scratch_london who asked for a “vegan dessert that doesn’t taste like cardboard”.
Well, as it’s Christmas I thought, what’s the least vegan friendly dessert?… I decided it was probably trifle…so I made it vegan! Love a challenge! So after many, many hours of testing the finished trifle is pretty jazzy  – I hope scratch_london approves. It’s got all the traditional layers of jelly, custard, fruit, sponge and booze – just the vegan friendly versions!

/home/wpcom/public_html/wp-content/blogs.dir/697/34179854/files/2014/12/img_3334.png

For the base:
50g coconut oil
50ml warm water
100ml vegetable oil
125g caster sugar
1/2 teaspoon vanilla extract
2 mashed bananas
125g self raising flour
1 whole pineapple, peeled, cored and chopped into chunks
3 tablespoons of dark rum

For the coconut panna cotta:
400ml coconut milk
100g caster sugar
1 tablespoon of dark rum
1 tablespoon of agar flakes (if you can’t get these try another vegan gelling agent such as a carrageenan based powder. Make sure you read the instructions on the pack though as the quantities could be very different)

For the pineapple jelly:
500ml pressed pineapple juice
Juice of 1 lime
100g caster sugar
1.5 tablespoons of agar flakes

Decoration:
50g coconut oil
100g icing sugar (plus extra for dusting)
1-2 tablespoons of coconut milk or grated creamed coconut mixed with water
2 tablespoons of toasted coconut flakes or desiccated coconut

/home/wpcom/public_html/wp-content/blogs.dir/697/34179854/files/2014/12/img_3331.jpg
Method
1. Line a 20cm square cake tin with baking parchment and grease with coconut oil. Preheat your oven to 180°C. Whisk the coconut oil in a large bowl with 25ml of vegetable oil and slowly pour in the warm water. The mixture should thicken and emulsify like a mayonnaise.

2. Now add the caster sugar, vanilla extract and the mashed banana and keep whisking until well combined. Then add the flour and remaining vegetable oil. Pour the mixture into your prepared tin and bake for 30-35 minutes or until a skewer inserted in to the middle comes out clean.

3. While the cake is cooking put the pineapple pieces on a baking tray and pop it in the oven for 20 minutes or so or until the pineapple is tender and starting to scorch at the edges.

4. When the cake is ready, turn it out and leave it to cool completely on a wire rack. Then, cut into squares and use to line the base of a large glass bowl. Pour over 3 (or more) tablespoons of dark rum then top with the roasted pineapple pieces- reserving a few pieces for decorating. Set the whole thing aside while you make the coconut panna cotta layer.

5. Pour the coconut milk into a saucepan along with the caster sugar and the rum. Stir well to combine then sprinkle over the agar flakes. Bring the mixture to the boil without stirring, then start to stir the mixture until the agar has completely dissolved. Now turn off the heat and pour over the pineapple and sponge base in the bowl. Leave to cool, then place in the fridge to set.

6. When the coconut layer has set make the pineapple jelly. Mix the pineapple juice, sugar and lime juice in a saucepan. Then, as with the last layer, sprinkle over the agar flakes. Heat until boiling, stir and then take off the heat. Make sure the coconut layer is completely cold and set before pouring all the pineapple jelly on top. Let this set and cool, then return it to the fridge one more time.

7. To finish the trifle place 50g of coconut oil in a bowl and gradually whisk in the icing sugar (ideally with an electric whisk). When the mixture is well combined but looks crumbly add a splash of either coconut milk or some finely grated creamed coconut which has been mixed with water. Just add a teaspoon at a time and keep whisking until it comes together to something of a similar consistency to whipped cream.
Either pipe or spoon this at regular points around the edge of the trifle interspersed with the reserved pieces of pineapple. Sprinkle over the toasted coconut flakes or desiccated coconut then dust the decoration with a little more icing sugar. Serve or chill until serving – should keep for a day or so.

/home/wpcom/public_html/wp-content/blogs.dir/697/34179854/files/2014/12/img_3333.jpg

/home/wpcom/public_html/wp-content/blogs.dir/697/34179854/files/2014/12/img_3329-0.jpg
Wishing you fabulous festive funtimes!

Big love Mim xx

NEWS
I’ll be taking new #askmim requests in early January so get thinking about what you would like to see and I might end up writing a recipe just for you too! All you have to do is use the hashtag #askmim on Instagram or Twitter. Your request will go into a hat with the others and one will be pulled out at random for me to make. Ask away! x

Red Cabbage Cobbler

Cooking, Recipes

Red cabbage cobbler

Hi gang! I’m back writing recipes, did you miss me? 🙂

To make up for my extended absence I asked you lovely lot on instagram, twitter and facebook to send me your recipe requests. I picked one at random, out of a bobble hat no less…and the request was for me to “make something veery interesting with Red Cabbage – lots of it!

tweet askmim


So, here goes, I hope it’s exciting enough for you N’ham Youth Theatre x

Thanks so much to all of you who submitted ideas – I will be picking a recipe at random again soon so if you would like to put an idea forward please get in touch via facebook, instagram or twitter using the hashtag #askmim – you can also use it for any foodie questions or conundrums you need help with.

Happy cooking xxx

red cabbage cobbler

Red cabbage cobbler

Serves 4 – 6

Ingredients 

1 tablespoon olive oil
20g butter
150g – 200g shallots, peeled and quartered
1 sweet potato or around 200g of diced sweet potato, pumpkin, butternut squash (or a combination)
1 tablespoon of plain flour
2 cloves of garlic, crushed
1 teaspoon juniper berries
1 red cabbage, about 1 kg, finely shredded
300ml red wine
couple of sprigs of thyme and rosemary (if they’re kicking about in the garden/on the window ledge/at the back of the fridge)
1 bay leaf
1 cinnamon stick
2 heaped teaspoons of cranberry sauce
2 heaped teaspoons of Dijon mustard

For the cobbles

50g butter
200g plain flour
½ teaspoon bicarbonate of soda
50g pecan nuts, chopped
100ml milk
lemon juice

Optional extras

100g feta cheese or 6 chipolata sausages
Pumpkin seeds
Sunflower seeds
Chopped parsley

Method

1. Heat the oil and butter in a really large saucepan over a medium heat. Throw in the shallots and fry for 5 minutes so they’re starting to soften. Next chuck in the sweet potato or squash, keep frying for another 5 minutes, then add the tablespoon of flour. Stir in the red cabbage, garlic, juniper berries, red wine and 300ml of water. Mix really well scraping the bottom of the pan to make sure the liquid lifts off all the flavour that’s caught there.

2. Turn the heat down to low and tuck the cinnamon stick, bay leaf and herbs into the cabbage, cover with a lid and leave to simmer for 1 hour.

3. Shortly before the hour is up, make your cobbles: Rub the flour and butter together with your finger tips – you know, till it looks all lumpy like fresh breadcrumbs. Add the chopped pecans, bicarbonate of soda, tiny squeeze of lemon juice and season with salt and black pepper. Pour in the milk, stir then knead just enough to bring the dough together into a ball. On a floured surface press the dough flat (about 3cm thick) with your hands. Cut it into squares or triangles or if you’re feeling super fancy use  a cookie cutter to make circles, stars, anything you like.  Preheat the oven to 180°C.

4. When the cabbage is ready either leave it in the pan (if your pan is oven safe) or transfer it to an oven proof dish. Pick out and discard the bay leaf and cinnamon stick then stir in the dijon mustard and cranberry sauce, taste and season with salt and pepper accordingly. Top the cabbage with the cobbles, brush them with milk or beaten egg and pop the whole thing in the oven for 20-25 minutes or until the cobbles are starting to brown on the top and are cooked through.

5. Serve! I had this just with some chopped parsley over the top but have also tried it with some feta cheese crumbled over in the last 5 – 10 minutes of cooking then scattered over some toasted seeds before dishing up, which was ace, but would also be smashing with a pile of cooked chipolatas. A green salad with a sharp vinaigrette goes really well with this too.

red cabbage cobbler served red cabbage with pecan cobbles

red cabbage cobbler with feta

Low Carb Diet

Cooking, Recipes

In response to my last blog post (where I offered to come up with dishes to help those on specific diets) I received the following email from a reader: (love the title she’s given me!)

Dear foodie agony aunt, 

I’m attempting a low carb diet and a few days in I’m already running out of meal ideas and I’m starting to lose steam… 😦
Criteria:
– I can have meat of any kind, but the leaner the better.
– Eggs
– Dairy (ideally low fat)
– Vegetables
– On the occasions when I eat carbs they should be low GI and very small portions
– Minimal use of oils/fats

Once a week I’ll be having no carbs during the day at all, so those days will be the hardest to vary. What I want to avoid is meals like spag bol but without the spag (where the carb is so clearly missing it’s depressing!).

Help!


Ahoy there Reader!

Thank you so much for writing in 🙂 Firstly, however I should say that cutting out a food group entirely is not always the best idea, so I’m glad you are permitted to have some carbohydrates in your diet. But more importantly, everyone is different and if you know this plan works for you I admire your determination to stick to it.

Right, now first let’s address the spag situation. Grab yourself a good vegetable peeler – mine is one of those ‘Y’ shaped speed peelers and it was from Morrison’s and cost 80p! It’s one of the best peelers I’ve ever had (and no this post is not sponsored by a supermarket).

1. Using a vegetable peeler create long ribbons – here I’ve used courgettes but carrots work really well too, or a mixture of both is even better!

DSC08589

2. Drop the vegetable ribbons into a pan of boiling water and cook for no more than about 3 minutes.

3. Drain and serve your vegetable mock-spaghetti with your bolognese sauce.

Alternatively make your own pesto.

DSC08605

This is a great way to use up store cupboard bits and you can vary it how you like or to suit your dietary plan.
Here I used a mixture of almonds and cashews, blended with rocket leaves and a little olive oil. I would normally have added garlic but I had to go out that afternoon so I flung a few capers in instead. Olives work well too and a little grated hard cheese…

Basically you need:

– a leaf (basil, spinach, rocket, mint or watercress)
– a nut (pinenuts, brazils, cashews, almonds or walnuts)
– a dash of olive oil
– salt & pepper to taste

Optional extras:
– grated hard cheese like Parmesan, Gruyere, Comté
– crushed garlic
– olives, capers and anchovies
– lemon juice

Blend all of your chosen ingredients together in a blender or smash them up in a pestle and mortor. Taste and adjust the ratio or seasoning as you like, have fun experimenting!

DSC08607

DSC08615

My second suggestion is an alternative to rice. It’s so simple it’s barely a recipe, but it’s super delicious!
All you do is coarsely grate some peeled butternut squash. Then pop it in a non-stick frying pan without adding any oil. Dry toast the grated butternut squash turning it frequently with a spatula so that it can all cook evenly. After about 5 minutes it should be tender but with slightly scorched edges, serve immediately with your main dish. I think this would be delicious with grilled fish and a green salad or with a good spoonful of chilli con carne!

DSC08628

DSC08630
Healthy eating and getting fit can be really difficult. I hope these recipes are helpful and what’s great is they actually take less time to cook than traditional rice or pasta!
I’ve started trying to get fit by doing some yoga and jogging. I’m not fit enough yet to brave the jogging route down regents canal – at busy times it can get quite hairy with Cyclists, Dog Walkers, Joggers and Canada Geese all getting tangled up under a footbridge.
Instead of joining them I’ve cleared a small area of floor space in my bedroom and use an app which shouts out various exercise or yoga instructions! So currently, my idea of a work out is to jog basically on the spot whilst a disembodied voice shouts “almost there” and “you know what to do!”. I normally find this really boring but I discovered that the jogging routine is approx 30 minutes long so there’s no reason why I can’t watch TV or a film to keep me entertained. So last night I jogged to an episode of Stewart Lee’s Comedy Vehicle on iplayer! Yay for cardio workout + satire! I felt much better about eating some more broccoli and pepperoni pizza… and a glass of my housemate’s red wine 😉
x

If you’re stuck for recipe ideas too, please do send me a message via the contact form or head over to my Facebook page.

Healthy Resolutions

Cooking, Recipes

Ahoy there team!
How are the New Year’s Resolutions going? I can’t even remember what mine were and it’s only just the end of February! If you’re still on a health kick, nice work! Whether you’re doing it to shed a few seasonal pounds, avoid foods which aggravate your system or alleviate an underlying health issue it’s always difficult to break old habits and stick to new ones.

In this blog post I wanted to write a recipe for some of my favourite people who are on a strict plant-based and whole-food diet. The recipe I’ve chosen is for bulgur wheat and salsa wraps which really super easy are great for sharing. They’re based on fajitas but instead of sour cream I’ve used tahini sauce and instead of cheese there are tasty toasted pumpkin seeds. Use shop bought whole wheat tortillas or make them yourself from whole grain spelt flour.

Spelt Flour Wraps

Bulgur Wheat and Fruit Salsa Wraps

The process of piling in as much of each of the fillings as you like is fun and I hope feels more like a treat and less like a diet food.

WrapsSalsa

Salsa
1 red chili
1 apple
2 tangerines or other small oranges
Small bunch of coriander
Juice of half a lemon
Salt and pepper

1) Finely chop the chili, apple, tangerines and coriander and put everything into a large bowl or serving dish.
2) Pour over the lemon juice and season well with salt and pepper.
3) Stir well and put into the fridge until you’re ready to serve.

Bulghur Wheat

Bulgur Wheat
4) Put 1 cup of bulgur in a heatproof bowl.
5) Add 1.5 cups of boiling water, cover and leave for 15-20mins or until all the water has been absorbed

Tahini Sauce

Tahini Sauce
3 teaspoons light tahini paste
6 teaspoons of water
1/2 teaspoon ground cumin

6) Mix the tahini and water together until the mixture is the consistency of thick cream. Add the cumin and stir well, add a splash more water if needed.

Lettuce, Pumpkin Seeds, Lemon and Avocado

To serve
1 little gem lettuce (shredded)
1-2 Ripe Avocados (sliced)
Lemon wedges
Pumpkin seeds (toasted)

7) Load up your own wraps and dig in!     Help Yourselves!

DinnerAdding Lettuce Ready to roll Finished Wraps More SalsaDesserts are often off the menu when you’re trying to stick to a healthy plan, but I’d find them super hard to give up entirely.
My favourite discovery is this banana ice cream, it’s made with blended, frozen bananas and that’s it! Genius! It really does end up like a premium ice cream but with the calorie count of, well…a banana!
And it doesn’t end there. Missing pastry? Try using ripe avocado instead of butter in your shortcrust recipes. Ok, so it doesn’t come out as crisp and rich but it’s not half bad. I made a sweet potato pie with avocado pastry recently and served it with banana ice cream and a cheeky drizzle of maple syrup! Yummers!

Sweet Potato Pie

I would absolutely love to hear from you about healthy eating and special diets. What foods are you currently avoiding? Send me a message in the comments box or via the contact page and I may be able to write a brand new recipe for you too.

Have a super weekend x

Oxford Marmalade

Cooking, Recipes

It’s marmalade season…although in terms of eating seasonably it doesn’t appear to be my year!
My fruitless search for forced rhubarb and wild goose-chase for full fat goat’s milk meant that it wasn’t a total shock when I couldn’t find a Seville orange anywhere. Seville oranges might be the marmalade makers choice but I’d planned to blog about marmalade this week and once it’s in the notebook, well, there’s no turning back! (with or without the right oranges!)
DSC07820[1]
Instead of Seville oranges I picked up a selection of oranges, clementines and lemons.
DSC07822[1]
I like recipes you don’t have to read (odd for a food writer I know) like those cake recipes where you use a yoghurt pot to measure out all the other ingredients or the “half fat to flour” rule for pastry.
For this marmalade I weighed out all he fruit I’d bought and it came to 1.3kg. For the sugar I used double that weight so used 2.6kg of demerara and the same number but in litres of water (2.6l). This seemed to be the simplest way and hopefully a handy rule of thumb for future marmalade adventures.

This batch is Oxford Marmalade for 2 reason: the first is the traditional addition of black treacle and the second (to make it really authentic) is that I sent a jar of the finished marmalade on at very own vacation to Oxford University!
DSC07826[1]

DSC07827[1]
1) The first step is to prepare the fruit. Cut each orange or lemon in half and squeeze out all the juice into a bowl. Then turn the fruit halves inside out so you can pull the flesh away from the peel. Put everything except the peel into the bowl with the juice.
2) Once all the fruit had been separated like this, slice the peel up into matchstick sized pieces and set aside.
DSC07835[1]

3) To cook the marmalade put the water, fruit juice, pips and flesh into a pan and bring to the boil. Allow the mixture to bubble away for about 15 minutes.
DSC07838[1]

4) Then pass the mixture through a metal sieve to get rid of the pips and bits of fruit. Put the strained fruit juice back on the heat and add the chopped peel. Bring back up to the boil for an hour or until the peel is soft and the juice has reduced by about half.
DSC07846[1]
5) Once the peel is soft you can add the sugar and a tablespoon of black treacle, this is the slightly scary part. You need to make sure that the sugar dissolves and then heat the mixture until it reaches the correct setting point. The traditional (fun) way to do this is to put a plate or saucer in the freezer and then when you think the marmalade is ready you put a few drops of it onto the cold saucer and allow it to cool. Then if when you press the blob of marmalade with your finger it wrinkles (the marmalade not your finger) then it’s ready. But, keep watching your marmalade and make sure that your saucepan is very large…if you take your eye off what is essentially boiling sugar, it will try to make a break for it and that’s not a good look! If you can see it starting to rise up make sure your hob gets turned off quickly and stand well back while it calms down. Don’t try and touch it – it’s properly hot!

6) When it’s ready put the marmalade into clean, sterilised and preferably warm jars. I wash mine really well with hot water and washing up liquid and then put them into the oven to dry before carefully pouring in the hot marmalade.

DSC07851[1]

DSC07860[1]

My marmalade did try to escape from the pan but it does clean off pretty well with a soft cloth and warm water.
DSC07848[1]

Clearly my marmalade had somewhere it wanted to be…so I sent it on a road trip to Oxford, I think it had a good time! Thanks for sending me these photos Damian!
IMG_3037

IMG_3052

IMG_3055

Goat’s Cheese

Cooking, Food Heroes, Recipes

This is Joe.

20140129-224915.jpg

When I first met Joe I was in his living room wearing pyjamas with my mascara halfway down my face. I had been painting the town red the night before with his housemate – my good friend Helen, and had ended up staying the night on their sofa.

Luckily he didn’t hold this against me. About a week ago Helen mentioned Joe had started making goat’s cheese in his spare time! Urrrm…AMAZING!

So on Saturday I managed to convince Joe to let me watch him make his latest batch in exchange for a slice of cake, a coffee and the link to the YouTube video where Harrison Ford pierces Jimmy Fallon’s ear!

First thing on the list: Buy Goat’s Milk. Sounds easy, goat’s milk is everywhere right? Wrong. We needed full fat goat’s milk which turned out to be as difficult to find as forced rhubarb!*

Things we learned on our Full Fat Goat’s Milk Quest:

1) People who sell cheese don’t make the cheese or know where you can buy milk. But, there is a marvellous selection of French Cheeses on Broadway Market. Plus, the people on said cheese stall said that if we found a goat they’d be happy to look after it for us.

2) The staff at Hackney City Farm were very helpful. They told us that:
a) they don’t sell goat’s milk
b) even if they did it’s the wrong season because goats don’t produce milk till the spring when they’ve had their kids
c) their goats won’t be having kids because they have tried to breed already them but without success
d) fresh goat’s milk has lots of goat hair in it.
e) their first thought as to why we wanted goat’s milk was that we must need it to feed our own baby goats (this isn’t really a fact it was just quite funny)

3) We couldn’t find any goat’s milk in Spitalfields either…although there is a statue of a goat which we felt was misleading and was most definitely mocking us.

Spitalfields

4) There’s a company at Borough Market called “the greedy goat” and they sell goat’s milk icecream, but they don’t sell the milk. They also told us that Neal’s Yard Dairy doesn’t sell it either but asked us to ask them anyway to show them there’s a demand.

5) Neal’s Yard Dairy don’t sell goat’s milk, and it’s not the right time of year for it anyway (we knew both of these things already but it’s always good to get a second opinion)

6) Waitrose near the Barbican does sell full cream goat’s milk!!! SUCCESS!

Milk

Goat’s Cheese by Joe

1) Put 50ml of boiling water into a jug or other heatproof container.
When the water has cooled to room temperature add 1 teaspoon of citric acid, stir thoroughly until it dissolves.

2) Put 2 litres of whole (full cream) goat’s milk into a large saucepan.

3) Stir the milk with a large spoon and with a “lifting motion” mix in the citric acid.

Adding the citric acid

4) Gently heat the mixture to 83°C stirring occasionally so that the milk doesn’t catch and burn on the bottom of the pan

5) When it reaches the correct temperature take the pan off the heat and leave to stand for 30 minutes or until there are what look like yellowish cracks in the mixture.

Split milk

6) Line a colander with a double thickness of muslin cloth (which has been sterilised) and fit the colander over a large bowl or pan

7) Pour the milk mixture into the lined colander. This will allow the whey to drain out into the bowl below leaving only the cheese in the cloth.

Pouring Milk

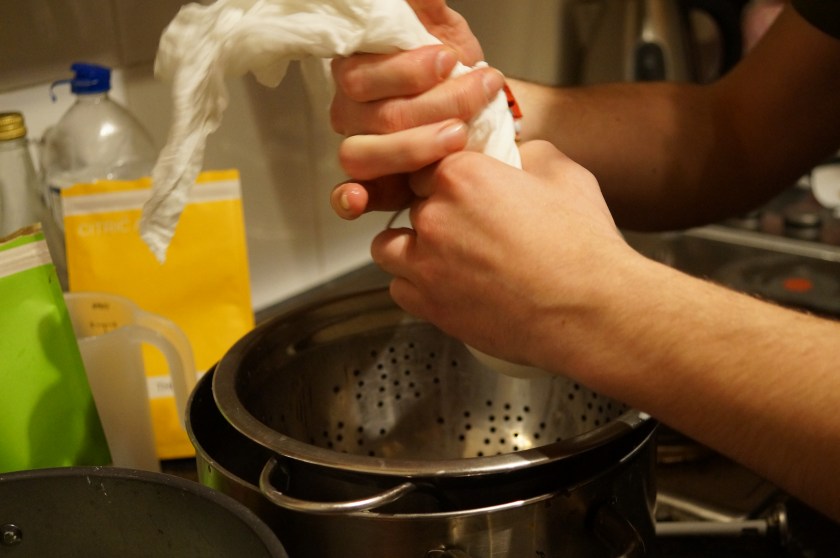
8) Stir in some salt (and some herbs too if you like) then twist the corners of the cloth up together to encase the cheese and squeeze out more of the whey as you do so.

Tie up the cloth

9) Tie the corners together and hang the cheese up with a bowl below it to catch the drips, leave like this for 2 hours

10) Pop the finished cheese in the fridge overnight to firm up, and that’s it! Easy 🙂

Finished cheese

The resulting cheese is creamy, rich and had a very subtle goat’s cheese flavour which intensifies in cooking. As well as generally scoffing this delicious cheese I used it to make some snazzy little tarts:

Goats cheese tarts

Goat’s Cheese & Red Onion Tarts: Line a greased bun tin with rounds of puff pastry then fill them with a mixture of fried red onions and onion chutney (or onion jam). Top with small pieces of soft goat’s cheese and a sprig of thyme.
Bake in the oven at 190°C for around 15 minutes.

As well as a pretty decent quantity of cheese you will notice that quite a large amount of whey is also produced. Joe said that from his research the main uses for excess whey were beauty related, and that some people even take baths in it! None of our housemates seemed keen on soaking themselves in thin goaty milky liquid but everyone munched the whey based soda bread I hurled together, which I jazzed up with some black onion seeds and fresh thyme.

Soda Bread

I’m still swimming in whey (not literally), so this morning I made pancakes with it too.

whey pancakes with syrup, cheese and pomegranate

Whey Pancakes: Mix 1 cup of plain flour with an egg and whisk thoroughly. Gradually add 1 cup of whey and whisk until smooth. Stir in a teaspoon of caster sugar and 1/2 teaspoon of bicarbonate of soda.
Use this batter to make small pancakes in a non-stick pan which has been greased with a little bit of vegetable oil. I served mine with some of the cheese, pomegranate seeds and maple syrup (although honey would be great too).

And finally. After all that, I STILL have some whey left, so I decided to test the theory that whey is super-fantastic for your skin by making a foot soak.

Whey & Lavender Foot Soak: In a pan I mixed 300ml of whey with 300ml of water. Then I added 1 teaspoon of dried lavender flowers and 1 teaspoon of honey. I heated the mixture gently until the honey had dissolved but the mixture wasn’t yet simmering. I then passed the mixture through a sieve to catch all the Lavender flowers and popped it into a large bowl ready for my toes.
Once it had cooled enough to touch I popped in my feet. The bowl wasn’t quite big enough (should’ve checked this really) but it did the job. I left my feet to soak until the liquid cooled down to room temperature and I got bored, but I must admit it felt pretty good. I don’t know of that’s the whey or just the fact it was nice warm water on my feet but either way I tried it and whey was used – huzzah!

*in my last blog post about crumble I struggled to find rhubarb, since then it seems to be everywhere. So I bought some, simmered it in water with some juniper, star anise, slices of oranges and lemons and then sweetened it with a dash of honey. When soft I scooped out the rhubarb and served it with some smoked mackerel and a few rocket leaves dressed with lemon juice and black pepper.
I then picked out the spices and citrus fruits from the simmering liquid and reduced it down to a (still quite thin) syrup. When cooled you can dilute this with fizzy water for a fancy rhubarb cordial! Whoop!

rhubarb and smoked mackerel

Crumble

Cooking, Recipes

This week I decided to write about Rhubarb. After much thought, research and contemplating possibly pairing it with fish, constructing an elaborate sarnie or shaking a cocktail I opted for a good, old fashioned rhubarb crumble recipe to banish a few winter blues.
But hey there, hang on, where’s all the rhubarb?! I thought it was forced rhubarb-o’clock…am I wrong? Or, did you eat it all while I’ve been sleeping?
Anyway, after traipsing round 3 supermarkets and at least 6 grocers this week I am still rhubarb-less.
On my way home yesterday (past the final green grocers before our street) my flatmate Damian spotted a big pile of quince. I haven’t cooked with quince before so I was quite excited to give it a go. Also quince gets a nice mention in the poem The Owl and the Pussycat which we had been discussing earlier that afternoon after spotting someone sporting a rather fetching Christmas jumper with an owl design on it on the Piccadilly line.

They dined on mince, and slices of quince,
Which they ate with a runcible spoon;
And hand in hand, on the edge of the sand,
They danced by the light of the moon,”

-Edward Lear

Talking of owls there’s a lovely photograph by Deana Kolencikova at the Taylor Wessing portrait photography prize exhibition at the National Portrait Gallery at the moment. The photo is called ‘Man with Owl and Lucy’. Lucy is a white west highland terrier who I remember seeing with her owner and his owl walking along Bridlesmith Gate in Nottingham one morning. Her owner was politely talking to passers by who wanted to know more about his owl but he wanted to make sure people knew how frustrating Lucy found being upstaged by the bird. Anyway, back to the quince…

Quince and Apple Crumble

…there’s no mince in this crumble (you might be pleased to know) and I don’t have a runcible spoon…although I do have a plastic spork or two somewhere which I think is nearly the same thing. In this recipe, I’ve added fragrant cardamom and a splash of rosewater (which in my head gives it a bit of an Old Elizabethan vibe). It’s very tasty, give it a go…and if you’re in London pop into the National Portrait Gallery…or look out for Lucy next time you’re in Nottingham. Whatever you’re doing this weekend just don’t tell me how delicious all your rhubarb recipes are because that’d be mean  x

Quince & Apple Crumble (aka not Rhubarb Crumble)

Ingredients
1 quince
1 Bramley apple
100ml water
1 teaspoon of ground cardamom
50g Demerara sugar
1 teaspoon of rosewater

For the crumble topping:
200g plain flour
100g unsalted butter
100g Demerara sugar
50g rolled oats
Pinch of salt

Method

1) Preheat the oven to 190°C.

Crumble base prep
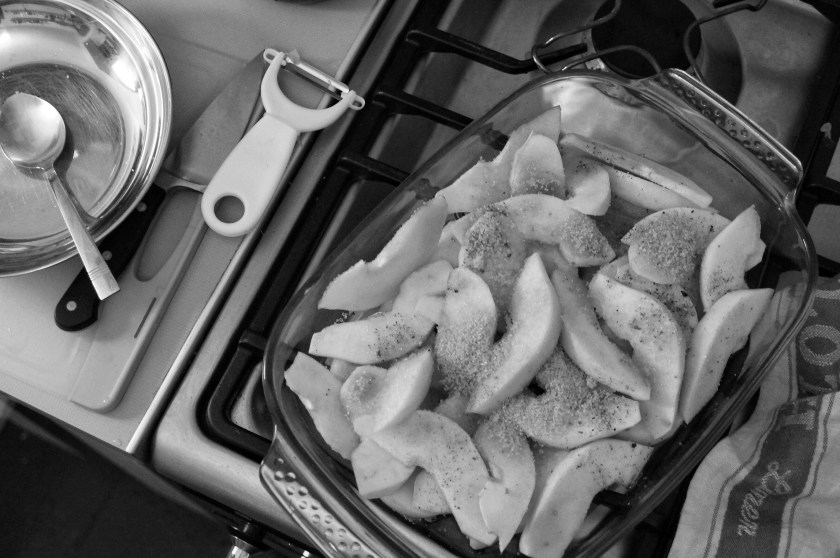
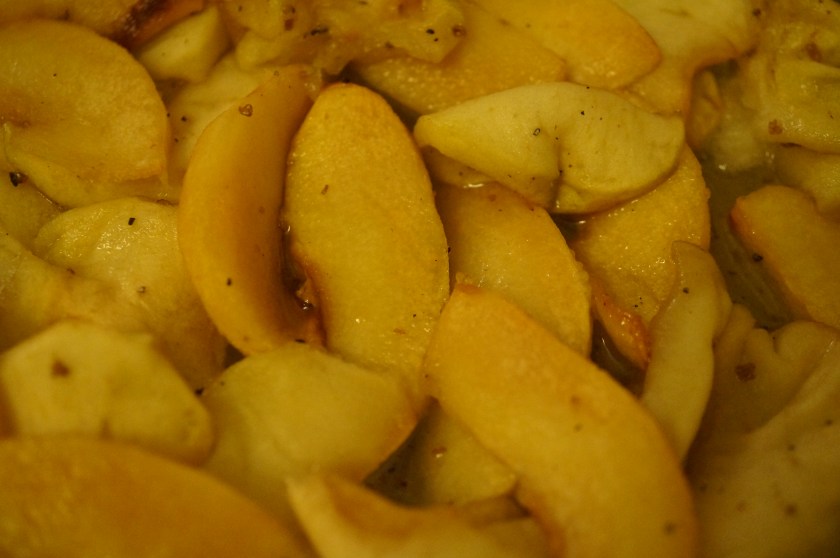
2) Peel, core and slice the apple and the quince. Lay the slices in a large ovenproof dish and pour over 100ml of water, the ground cardamom and 50g of sugar.
3) Bake in the oven for 45 minutes (stirring occasionally to ensure that the top layer of fruit doesn’t get scorched).
4) Meanwhile, make the crumble topping by rubbing the flour and butter together between your fingers until it resembles fresh breadcrumbs.
5) Now stir the remaining sugar, oats and salt into the flour and butter mixture and set aside.
6) When the fruit is soft sprinkle over the rosewater and then cover the fruit with the crumble topping.

Cooked apple and quince

rosewater and crumble topping
7) Return the dish to the oven for 25-30, minutes or until the topping is crisp and starting to turn golden at the top and edges.

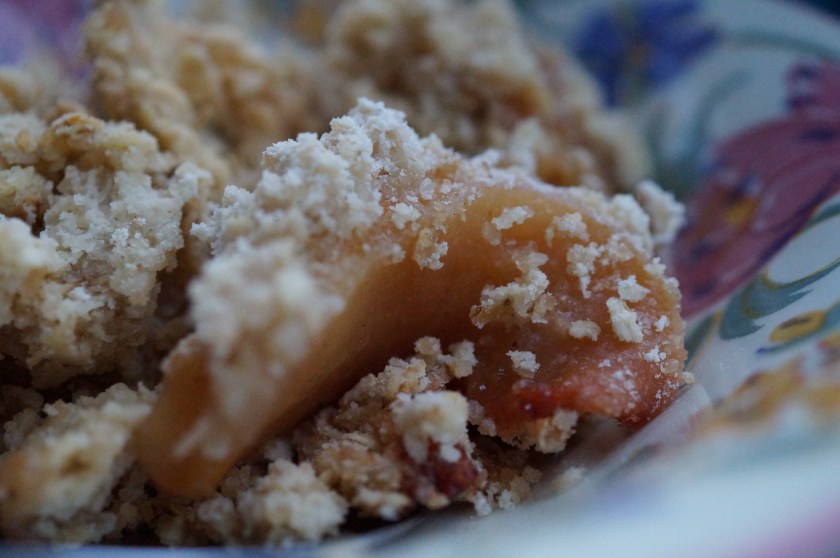
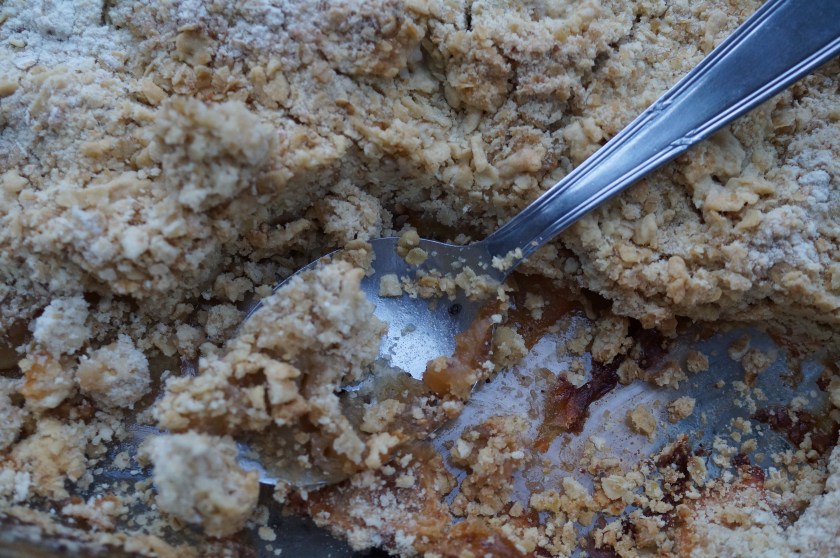
Cooked Crumble
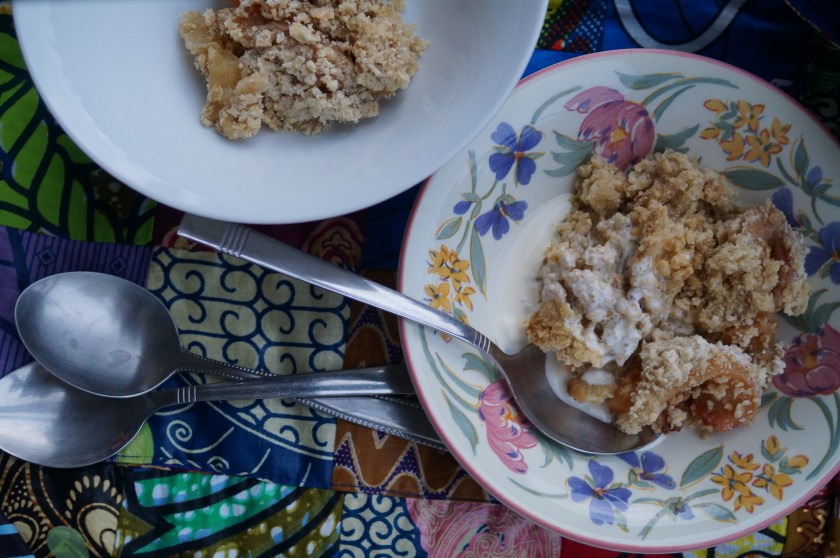
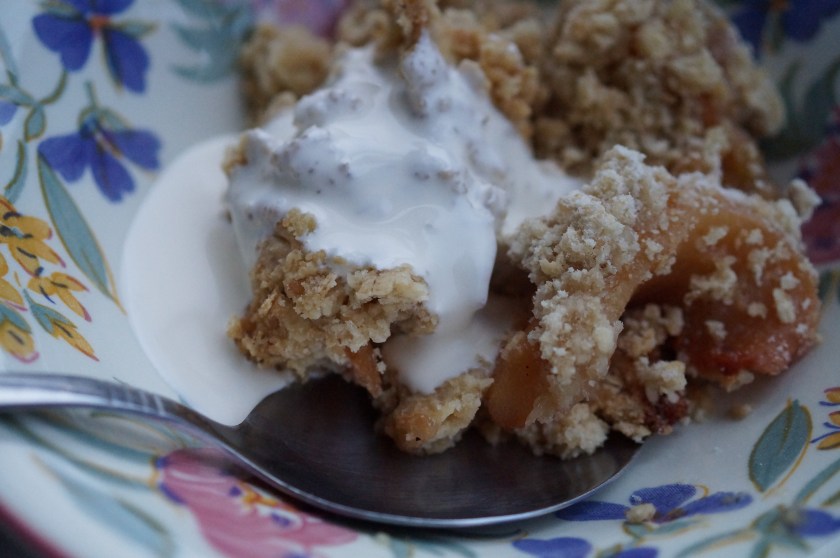
8) Serve with custard, cream, yoghurt or ice cream.Crumble dishes Crumble with cream

Crumble Dish

Happy New Year!

Cooking, Recipes

Firstly a very Happy New Year, I hope you all had a wonderful time over the festive season and have exciting plans for 2014. Secondly I want to apologise for the long silence…

In the time between now and my last blog post I’ve had the official launch party for my first book “Cooking Without A Kitchen”, become newly single and moved in to a lovely flat in East London.

Photo © Jonathan Rose

So swings and roundabouts seems to sum up the last few months. Whichever one of those is better (swings in my opinion, roundabouts make me feel a bit queasy) then that’s where I currently find myself as things are definitely looking up.

DSC07762[1]

For starters I flippin’ love East London. Ok, so there are quite a few people with complicated moustaches who seem incapable of smiling or wearing socks with their brogues (what’s that about?!). But, there are cheerful organic grocers everywhere and I can go for long strolls along Regent’s Canal whenever I want, ooh and on Sunday I can wander down to Columbia Road and buy flowers! London Fields station itself smells like malt loaf all day long because there’s an independent brewery at one end of the road and a sourdough bakery at the other. It’s brilliant. You get the picture.

shopping Broadway Market London Fields Regents Canal

2014 can’t be all about eating and skipping along flower markets though I’ve got to get some work done too. I have promised to help out with those on New Years resolutions diets by coming up with a fun healthy vegetarian or vegan recipe once a month, watch this space. At the moment I’ve had a request to provide recipes which are free from oil, sugar, meat, fish and dairy but please do get in touch if there is something you are also trying to cut out or eat more of, I’d love to hear from you.

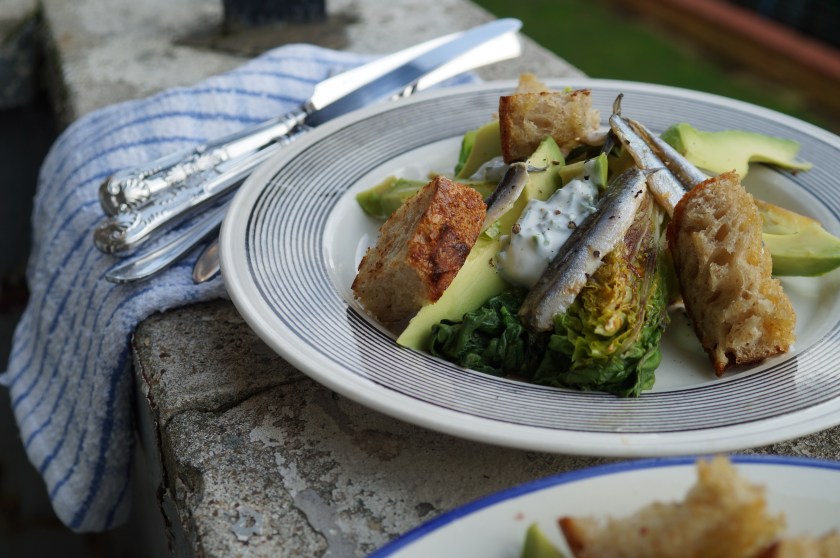
Now for a recipe! As part of settling in to my new neighbourhood I spent the morning sussing out the local shops and with my purchases whipped up this tasty warm salad. If you haven’t cooked little gem lettuce before I strongly recommend you give it a whirl it’s delicious; surprisingly nutty and the bitterness you often get from the leaves in the centre is mellowed by the cooking process.

Panfried Little Gem and Garlic Crouton Salad

Pan Fried Little Gem and Garlic Crouton Salad

Serves 2

Ingredients

2 thick slices of sourdough bread
Olive oil
Small Bunch of chives (finely chopped)
2 tablespoons of Greek Yoghurt
2 tablespoons of lemon juice
2 little gem lettuces
100-150g of marinated anchovy filets
1 ripe avocado
1 garlic clove (crushed)
Salt and Pepper

Method

1) Cut the bread into large cubes and fry in 2 tablespoons of olive oil until golden.

2) Throw the crushed garlic into the pan with the croutons just briefly to soften it and take the rawness out.

3) Take the pan off the heat and tip the croutons onto some kitchen paper to drain off any excess oil.

4) In a small bowl mix the yoghurt, lemon juice and chopped chives together. Season with salt and black pepper and set aside in the fridge until later.

5) Wash the lettuces but keep them whole and slice any muddy or discoloured ends from the stalk. Cut the prepared lettuces into quarters and fry in a non-stick pan without any oil until they start to brown. Pop the cooked lettuce onto a plate and drizzle over a little olive oil or better still use some of the marinade from the anchovies.

Pan fried little gems

6) To serve arrange spoonfuls of the yoghurt dressing onto the plates, top with the little gems, slices of avocado, anchovies and then scatter over the croutons and season everything with a generous amount of black pepper.

Little Gem Salad